Photo: Tornado Trail in Massachusetts As Seen From Space
Another stunning satellite view from NASA.
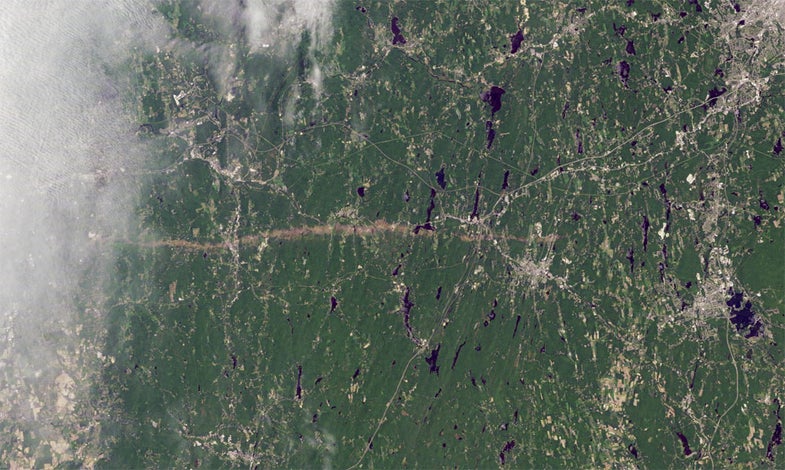
NASA’s Earth Observatory provides a regular flow of incredible images, but this one depicting the trail left by last week’s deadly tornado in Massachusetts is incredibly dramatic.
The pale line across the screen represents a 39-miles path of destruction that is, at points, up to a half-mile wide. The images was captured by the Landsat 5 satellite on June 5th.
Get the full resolution version at the NASA Earth Observatory site.
**RELATED: **[A Before and After Look at the Destruction in Japan](A Before and After Look at the Destruction in Japan)
