GoPro Hero 9 Black camera Review: An underrated tool for photographers
The GoPro Hero 9 offers some useful upgrades over its predecessor including better battery life and even smoother image stabilization.
We may earn revenue from the products available on this page and participate in affiliate programs. Learn more ›
Years ago, I strapped a GoPro Hero 4 to my chest and flung myself down some of the most famous mountain bike trails in the world at Whistler mountain bike park. I still go back and watch that footage from time to time as shaky and slow as it is. While I don’t participate in many action sports these days, my time spent with the GoPro Hero 9 Black action cam helped me realize that a good waterproof action camera can be a valuable asset in just about any camera bag here in the “everything is content” era.
What is the GoPro Hero 9 Black?
Stan Horaczek
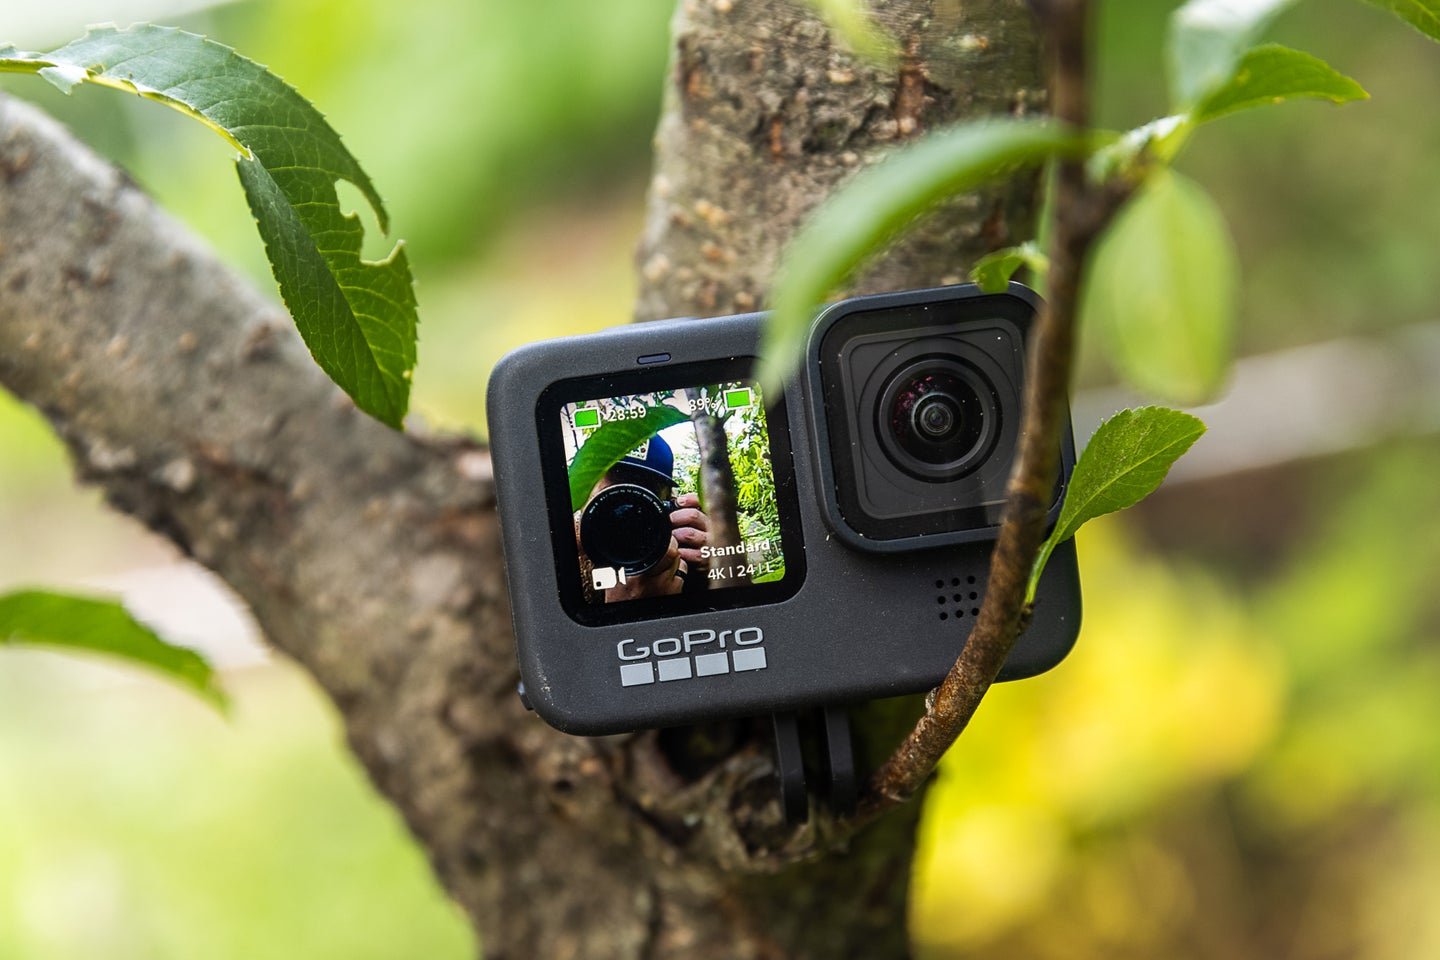
If you haven’t picked up a GoPro in a while, things have changed quite a bit. The small, rectangular form factor has remained basically the same, but the guts have gotten a tangible overhaul.
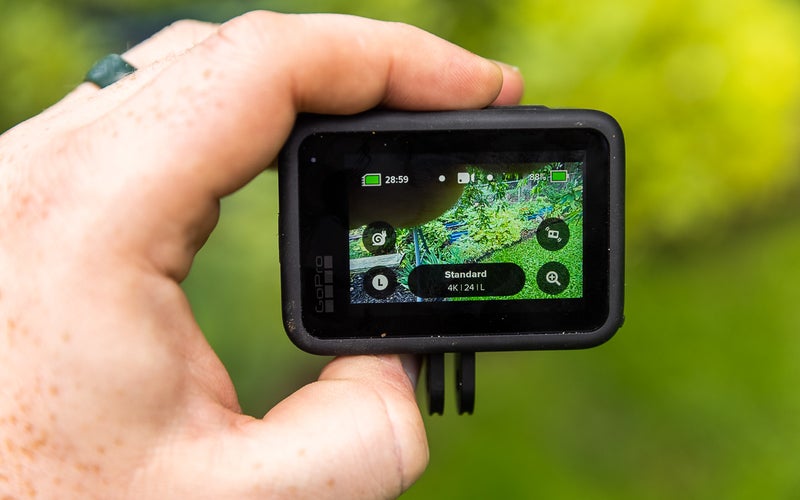
Compared to the previous GoPro Hero 8, the Hero 9 offers a new front-facing display that shows you a live feed from the sensor in addition to camera settings. That makes setting up selfie-style shots much simpler, especially when you’re participating in sketchy activities.
The Hero 9 Black can capture up to 5K footage at up to 30 fps. That’s not 8K like some smartphones promise, but 5K is also much more practical at least for the moment. For stills, you now get access to 20-megapixel pictures, which is up from 12-megapixels in the previous version.
The swappable lens “mods,” probably represent the biggest hardware upgrade. Add the Max Lens Mod and you get a super-wide 155-degree field of view and offers a feature called Max HyperSmooth. It allows you to lock the horizon in place and then rotate the camera 360 degrees while keeping the shot exactly the same. It’s a truly impressive effect to see in action, but it’s likely not super practical for most shooters who don’t plan to take the camera airborne. Still, the prospect of swappable lens modules is exciting all on its own.
The modular system also supports a $50 light mod, which adds LED illumination to the camera. If you never want to mess with mods, you certainly don’t have to. But, it does give you options if you want to expand your gadget stockpile down the road.
Shooting video with the GoPro Hero 9 Black
Obviously, video capture represents GoPro’s bread-and-butter functionality. As stated above, the resolution caps out at 5K at 30 fps. Step down to 4K and you can go up to a smooth 60 fps. 2.7K enables up to 120 fps for 4x slow-motion. And you get a full 240 fps (8x slow motion) if you step down to 1080p HD.
Even when you get down into the lower resolutions, the Hero 9 still maintains a high bitrate, which means the footage looks good, even cut up against higher-res shots. That’s especially true if you’re shooting in slow-motion. The impressive nature of the slow footage often compensates for any subtle quality loss.
From a photographer’s perspective, the constant 5K capture can come in handy because that puts each frame in the roughly 15-megapixel realm. If you’re covering a sport or some other kind of event, it’s possible to stick the GoPro somewhere, let it record, then pull high-res screens later that are big enough to print if you really want to.
You can control the camera through an app–it connects via Bluetooth. But, the GoPro Hero 9 Black now also follows voice commands and allows for scheduled recordings. You can stick the GoPro above the hoop at a basketball game to get a unique perspective, then schedule it to start shooting when the game begins and go until the card is full. And that’s all without having to worry that the Bluetooth won’t connect when it’s go time.
Automated editing with the GoPro App
Shooting pretty video is a skill that translates fairly simply from photography. Editing is another story. The GoPro app can automatically stitch together your footage and try to put together customizable arrangements of your shots to create videos. I typically avoid auto-editing of any kind when it comes to creative work, but the GoPro app does a surprisingly good job. Even if you have zero skills, it can make something watchable from a random collection of shots.
The app has been getting better over time, too. It used to be a lot buggier than it is now. If you haven’t tried it in a while, give it another shot.
HyperSmooth 3.0 really is amazing

If you haven’t used a GoPro in a couple generations, you might be genuinely surprised at how good the image stabilization has gotten. I’ve been working on a video series in which I mount the GoPro to the hot shoe of an old film camera to get a camera-eye-view while I shoot. HyperSmooth easily takes the wobble out of walking shots and keeps the frame dead still when I’m not moving.
We gave the original version of HyperSmooth a Best of What’s New award over at Popular Science and now the company is into version 3.0. Even compared to the solid image stabilization you’ll get with your smartphone, HyperSmooth is a whole other beast.
In fact, it can actually feel a little too smooth from time to time. You’ll never get shaky footage that will make you nauseous (which actually used to be a thing), but it can look a little unnatural. After spending some time with the camera, I can almost immediately recognize footage shot with HyperSmooth.
Photography modes


The new 20-megapixel resolution offers another advantage over shooting with a smartphone. Some high-end models eclipse that number, but iPhones cap out at 12-megapixels no matter how far up the Pro Max chain you climb.
The Hero 9 can capture raw photos and now offers improved HDR performance to put it closer to the quality you expect from a high-end smartphone. Hold the photo button down and you can shoot bursts at up to 30 fps depending on your settings.
From a pure photography standpoint, your high-end smartphone will probably outperform the GoPro if only because companies like Apple, Samsung, and Google have done so much work on the computational photography part of the process. But, the difference is small and the GoPro isn’t afraid to come with you into gnarly situations like swimming in the ocean or cliff diving.
Embrace the time lapse
Shooting time lapses with your main camera can be somewhat stressful. You often have to use a full-sized tripod and babysit the camera so no one messes with it. The GoPro makes it much simpler. You have a bevy of mountain options if you’re willing to buy a cheap accessory (most are well under $10) and you can be a little more cavalier with placement due to its rugged build.
The GoPro Hero 9 Black offers a host of different time-lapse options. The Time Warp feature allows for moving time-lapses. So, if you want to make a time-lapse video of your photo walk, you can do so without the footage coming out jittery and unwatchable. The stabilization features really come in handy here. You can make Time Warp videos at a variety of intervals up to 4K resolution.
It can also do more traditional time-lapse videos in which the camera stays fixed. If you’re shooting at night, it also offers a specific night shot time-lapse mode that opts for longer exposures.
I found the GoPro a really great tool for experimenting with time-lapse photography, especially because the GoPro app makes them so easy to playback and edit. I think it’s worth having one of these in the bag just for this feature.
Why do you need a GoPro if you have a smartphone?

If you just go by the spec sheets, smartphones can do most of what the GoPro can. You get HD video with image stabilization, and apps can provide in-depth time-lapse features. The GoPro Hero 9 Black does win handily in some areas, though.
When it comes to ruggedness, it’s no contest. The GoPro Hero 9 Black is a truly waterproof camera that can work comfortably underwater down depths of 33 feet. Even if you can use your smartphone under small amounts of water, the touchscreen balks at your commands when it’s wet. If you want to shoot underwater, get a GoPro.
The same goes for dangerous situations. The entire GoPro housing is bash-proof. You could roll it down a mountain and reasonably expect it to work when you pick it up on the other end.
Image stabilization also gives the GoPro a serious advantage. Whether you’re shooting fast action sports POVs or just doing walk-and-talk videos, the HyperSmooth 3.0 tech is truly impressive. It may just inspire you to become a YouTuber. And even if your opinions and personality are bad, at least your footage will be steady.
You should also consider the sheer volume of GoPro accessories offered on the market. Whether you buy official first-party GoPro accessories or cheap stuff from Amazon, there’s a mount to put a GoPro basically anywhere and it will probably cost you less than $8.
Who should buy a GoPro Hero 9 Black
While I think this is a great tool for pretty much any camera bag, it doesn’t come without drawbacks. You can expect to pay $350 to $399 on-sale at this point, which isn’t an insubstantial investment.
There’s also a learning curve. For instance, the video resolution and frame rates you choose sometimes limit the amount of zoom you can apply to the image. You can’t always go super-wide if you want to get maximum resolution and fps. The menu system can also be clunky as you’re getting used to it.
Once you’re past all of that, though, it really does open up a number of really cool creative opportunities. You can shoot underwater, make Time Warp videos of your photo walks, create time lapses of your shoot setups, and just shoot fun video. You can still get older models for even cheaper, but the Hero 9’s front-facing screen and extra battery life are worth the extra cash. I also suggest getting a few extra batteries if you take the plunge because you’ll only get a few hours on each one.
