How to use vintage lenses on your mirrorless camera or DSLR
Putting vintage lenses on your new camera body is fun and surprisingly simple.
We may earn revenue from the products available on this page and participate in affiliate programs. Learn more ›
There are few things as exciting for photographers as getting a new lens. Unfortunately, those metal-and-glass cylinders can get mighty pricey, especially if you want the latest and greatest models. Check out the second-hand market, however, and you’ll find a myriad of vintage lenses, many of which can adapt easily and cheaply to your fancy modern camera body. Most of them won’t match the pure imaging prowess offered by brand new glass, but some offer unique and stylish looks that may scratch your artistic itch.
Vintage camera lenses are having a moment right now thanks to director Zack Snyder and his recent Netflix movie, Army of the Dead. He used a classic Canon 50mm f/0.95 lens to create the surreal blur in some of the scenes. In fact, more and more moviemakers are relying on vintage cinema lenses to get unique looks. Collectors call that lens the “dream lens” for a reason other than its high price. But you don’t have to spend huge cash to get fun old glass.
Before you fire up your eBay account and order up copious amounts of vintage glass, it’s worth doing a little research and prep work to make sure you’ll get your desired result. Buy the wrong gear and you could end up with lackluster performance or even damaging your camera.
Adapting lenses is easier with mirrorless cameras

If you’re currently using a DSLR, you can absolutely get into adapting vintage lenses, but it’s not quite as simple as it is with mirrorless. DSLRs have relatively large distances between the lens mount and the film plane (called the flange distance). This can cause issues with vintage lenses achieving a full-range of focus. If the camera’s flange distance exceeds that of the lens, you won’t be able to focus to infinity because of those pesky laws of physics. Because mirroless cameras keep the lens much closer to the sensor, adapting older glass is much simpler.
DSLRs also have mirrors inside that flap up and down when you take a photo and that can cause issues. For instance, I tried adapting the truly wonderful Contax 50mm f/1.7 C/Y mount lens to an older Canon 6D and the mirror hit the back of the lens every time I took a picture. That’s bad. I could still use it, but I had to stay in liveview mode the entire time.
Lastly, mirrorless cameras typically offer more features that help with focus. When using an old lens, you can expect to manually focus the vast majority of the time. A mirrorless camera will let you keep your eye in the viewfinder while you zoom in to check your focus, or enable focus peaking, which uses striped graphics to show you what part of the image will be sharp when you press the shutter.
Choose the lenses you want to adapt
It’s easy to end up with plastic bins full of junk lenses if you don’t make your buying decisions with purpose. There’s a big difference between vintage Leica lenses or vintage Zeiss lenses and the random Sears-branded glass you typically find at garage sales.
If you’re looking for a good place to start, there are a few lens lines that vintage enthusiasts gravitate toward. I particularly like the Pentax Super Takumar models, which use the screw-style M42 mount. They’re small, relatively easy to find, and provide excellent image quality. The lens coatings give them very nice contrast and color rendition. Lenses like the 50mm f/1.4 SMC are icons in the vintage lens community.
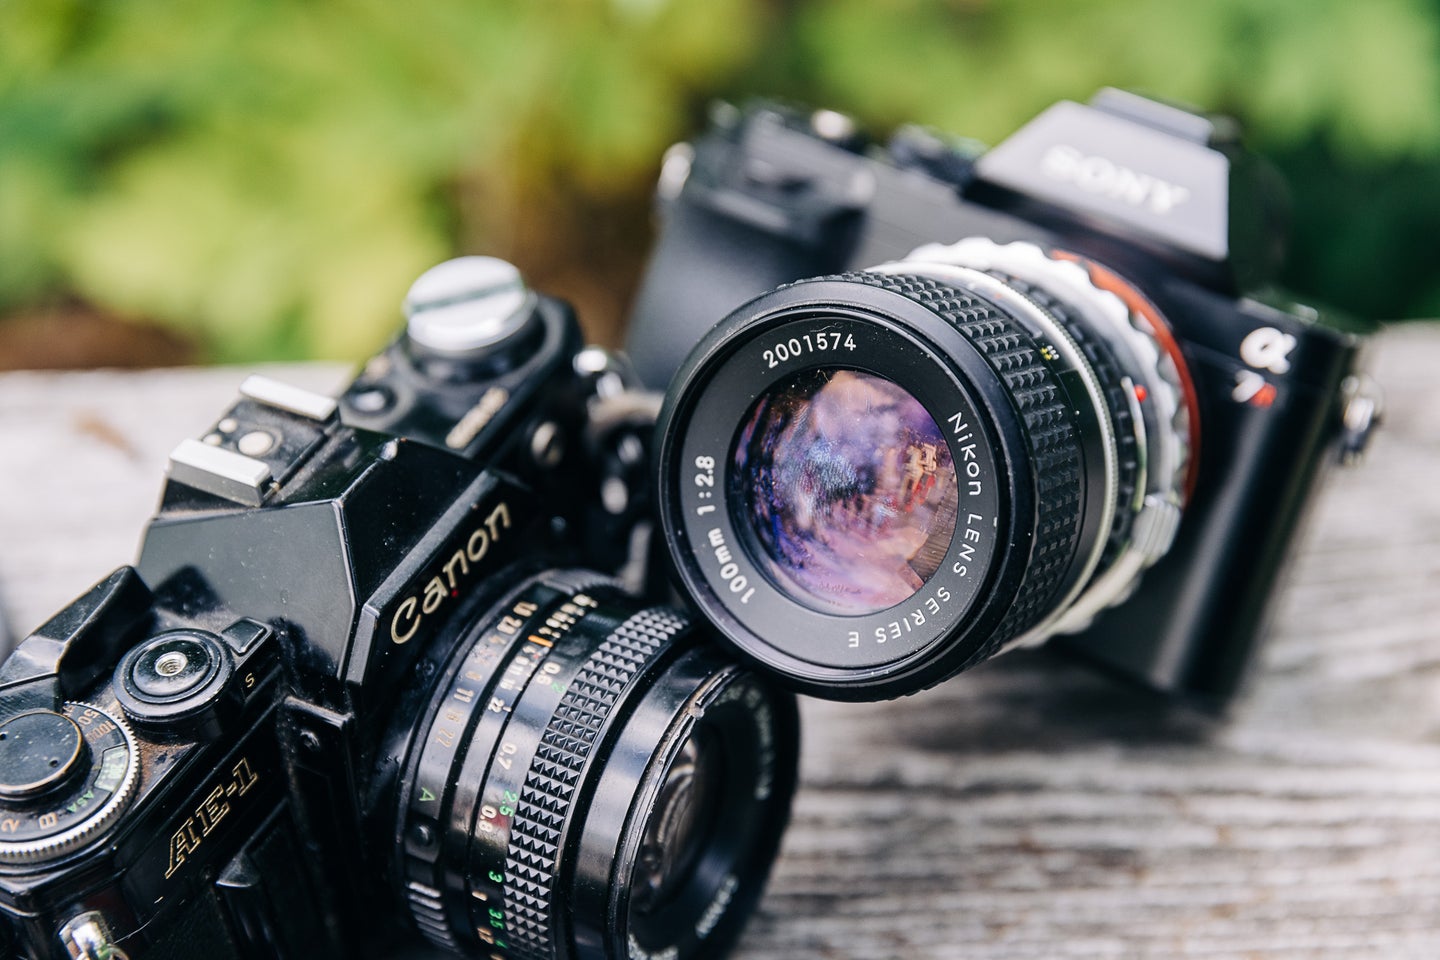
Vintage Nikon lenses and vintage Canon lenses with FD mounts have started to increase in popularity lately. Both lines are compatible with a wide range of old film SLRs if you decide you want to shoot film along side your adapted digital setup. These lines also provide super-cheap entry points. For instance, the Nikon 50mm f/1.8 E-series lens is abundant on ebay and you can sometimes find them for $25. It was an entry-level lens when it was new, so it’s not super sharp when shooting wide-open and it’s very prone to flare in strong backlight, but those can be desirable features for some shooters. Cheap vintage lenses can be a lot of fun if you manage your expectations about them.
Look for the prime lenses

This is a matter of personal preference, but I typically recommend that people start with quality vintage prime lenses over zooms. Zoom lenses have lots of moving pieces, which introduces more opportunities for weird problems that can ruin your images. The overall image quality from old zooms is typically very spotty, too. They often heavily vignette and create darkened corners. And their sharpness typically lacks compared to a prime.
Slapping an old zoom on a modern camera can be fun–especially if you get something decent like the Vivitar 1-series–but they can quickly go from charming to plain ugly if you don’t know what you’re getting into.
Choose the right adapter
Most of the time, when using old lenses on modern cameras, you’ll need an adapter. That’s not always the case. Nikon F-mount cameras, for instance, can accept some vintage lenses without an extra piece of gear. If you’re using a mirrorless camera, adapters are essential gear.
When it comes to choosing an adapter, you have to consider a few variables. Consider your options when trying to mount Canon FD manual focus lenses to the company’s current RF-mount mirrorless cameras. The options on B&H currently run the pricing gamut from a basic $43 model, all the way up to a fancy $189 Novoflex adapter.
There are several reputable companies in the adapter market, including Fotodiox, Novoflex, and Metabones. If you’re looking for cheaper options, companies like Fotasy and K&F offer their adapters on Amazon.
You’ll want to spend a little more money for a good adapter if you plan to use it a lot. The extra cost typically gets you improved materials and sturdier construction. Plus, buying from a brand like Novoflex typically ensures that everything will fit together with tight tolerances. You don’t want the lens or adapter to wiggle at all when you assemble everything because that can cause damage over time.
If you’re just adapting occasionally or you’re using an older camera that you don’t mind subjecting to a little wear and tear, the cheaper adapters may serve you just fine.
Don’t expect autofocus or other features
Your modern camera has autofocus, but those old lenses rarely do. And even if they’re AF-enabled, the adapter will typically disable that feature. For example, I have an old Nikon 300mm AF telephoto lens with AF built-in. But, when adapted to my Canon R5, it’s manual focus only.
You’ll also typically need to choose lenses with aperture rings built-in so you can open and close the aperture manually. The controls you typically use to control aperture on the camera won’t do anything on an old school lens. Some adapters include basic control rings in order to let you control the aperture. For instance, the K&F adapter I use to put old Nikon lenses onto a Sony mirrorless camera has a built-in ring that controls the aperture when shooting.
Because the adapter doesn’t have any built-in electronics, you also shouldn’t expect it to communicate with the body at all. That means your camera will typically read the aperture as F00 or even just “E.” If you want to remember what f-stop you shot at, you’ll have to write it down or type it into your notes app.
Make sure your camera is set up to fire without a lens attached
Once you have everything assembled, it’s time to shoot. Some cameras, however, won’t fire the shutter without a lens attached until you go in and change the settings. If you try to shoot and your camera throws an error along the lines of “no lens attached,” check your camera’s manual to find out how to enable shooting without a lens. You may also just be able to find the setting on your own by digging through the menu system.
Expect weird things to happen with vintage lenses
While many vintage lenses offer charming, artsy image quality, some are just plain ugly. When cameras have old coatings, lens flare can go from cool effect to picture-ruining haze extremely quickly. If you’re using a high-resolution camera like the Sony A7R series or the Canon R5, you may also notice weirdness due to the fact that the lens can’t resolve enough detail for the pixel-laden sensor.
Whatever happens, the adaptation process is mostly about experimentation. Try stuff and take notes so you can learn from your shooting. And be careful because collecting vintage lenses can be a slippery slope. It starts with a cool vintage lens you got at a yard sale and ends with eBay bidding wars for rare versions of old glass.
FAQ
Here are a few common questions answered about the vintage lens adaptation process.
Why use vintage lenses?
Some shooters like them for the look. Old coatings, for instance, can provide unique image qualities that modern lenses won’t. If you don’t need fancy features and you don’t mind manual focusing, you can also save a lot of money buying vintage glass instead of current models.
How to clean vintage lenses
The old coatings applied to lenses weren’t nearly as tough as they are today. Wiping them with your t-shirt, for instance, can cause an ugly phenomenon called wipe markes that mar the glass elements. LIght wipes with soft cloths are typically OK, but a quick google search before you start cleaning my save you from destroying your new lens.
What vintage lenses will work with Canon EOS?
Since Canon EOS cameras are some of the most common out there, this question comes up a lot. The EOS lens mount has a long flange distance, which makes it somewhat trick to adapt some lenses. The adapters either have to be extremely skinny, or even include an extra bit of glass to modify the lens’s image circle. If you’re going with a Nikon DSLR, stick with a common mount like the older Nikon F glass, which video shooters have been using on Canon DSLRs since the days of the old 5D Mark II.
