How to edit your ex out of a photo
Just in time for Valentine's Day, three handy methods for removing a former flame from just about any photograph.
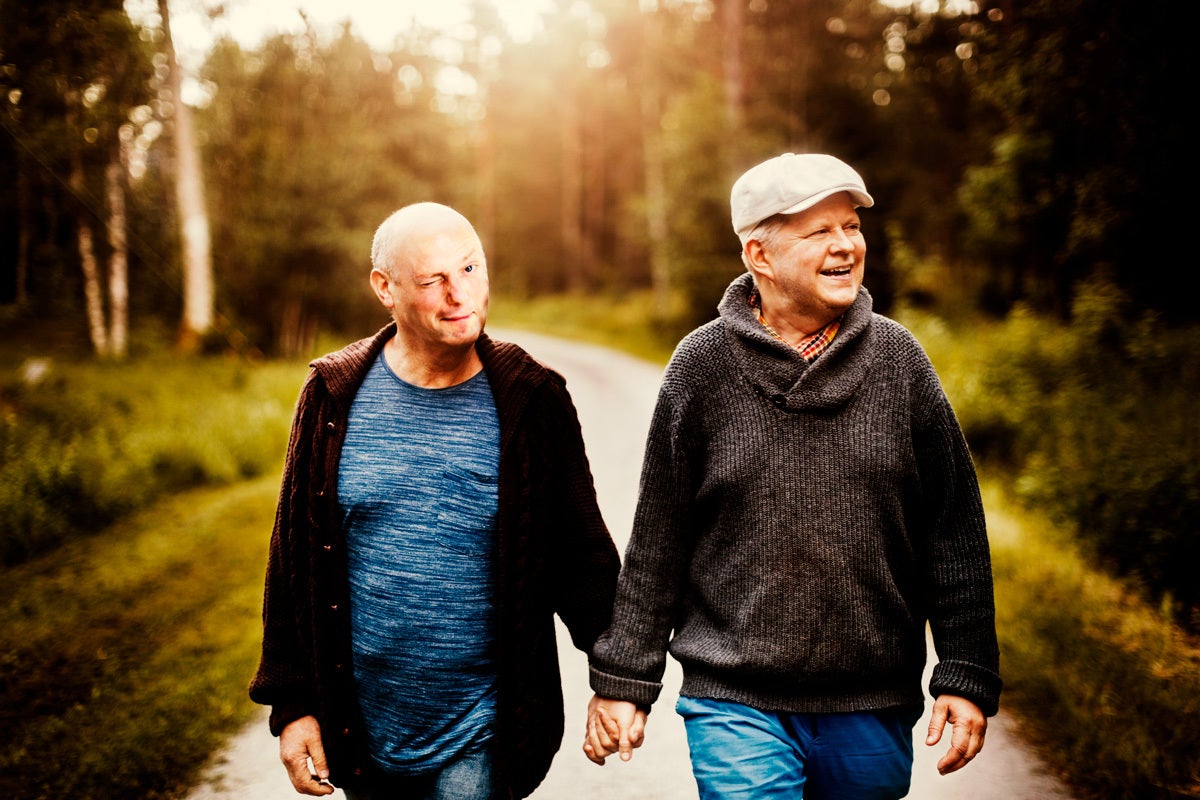
Good photos can come from bad relationships, so, if you have a few great snapshots lying around that could be much improved with the removal of a certain someone, we’re here to help. No scissors necessary.
Before we begin…
There are quite a few different techniques you can use to remove someone from a photograph. How well they work depends on the photo, how well you can use Photoshop (or your image editor of choice), and, most importantly, the time you’re prepared to spend doing it.
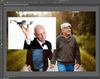
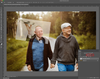
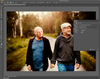
Here’s a serious example from Reddit. The photographer was able to remove the (former) bride from a wedding photo so the (former) groom could have a nice picture with his grandparents. This level of editing is entirely possible, but it takes a few hours. As you’ll see, you can get good results with a few minutes of work, but incredible results take a lot of time.
Also, for this, I’m going to use Adobe Photoshop. It’s one of the most popular and powerful editors around and the app I’m most familiar with. Other apps like Affinity Photo or Capture One can also do the job, you will just need to use the equivalent tools and techniques.
Finally, there are always dozens of ways to do things in Photoshop. To make this accessible and easy to follow—even through tears—I’ve gone with some of the blunter options. I think you’ll be impressed with the results I get, but a more nuanced approach with some of the more manual tools will give even better ones.
Now, let’s get cathartic.
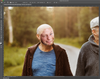
Method 1: Crop, crop, crop
Cropping is by far the simplest option and, let’s be honest, the image composition probably wasn’t exactly world-class to begin with. Don’t worry about symmetry, rule of thirds, or anything else, just grab that crop tool and make your ex vanish (like they never do in real life). In Photoshop, the Crop tool is in the Tools bar on the left, or you can use the keyboard shortcut C.
Click-and-drag on the handles to adjust the image, then when you’re satisfied, press Enter (Return on a Mac) and you’re done.
Voila!
Method 2: Clone them out

Removing your ex from a photo by cloning (or copying) other elements to cover them up is perhaps the most Photoshop-y technique you can do. In the right situation, it can be incredibly effective with even a small amount of work. For this one, I’m going to use a two-step process:
- First, I’m going to create a really rough patch with Photoshop’s content aware tools that covers over the person I want to remove from the image.
- Next, I’ll use a layer mask to fine-tune things so it looks good.
If none of these words make sense to you, this technique might be a bit beyond your current skills, but try and follow along anyway. It’s the best way to learn and you might be surprised at just how easy Photoshop can be to use.
Creating a rough patch (like the end of the relationship)
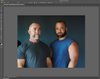
To create the rough patch, I’m going to use two tools (no, not unaddressed issues and alcohol): the Healing Brush and the Patch Tool.
Both the Healing Brush and the Patch Tool are available in the same menu in the Tools bar. Just click-and-hold on the icon to select a tool from the sub-menu if it’s not visible. (You can also select whatever healing tool is visible with the keyboard shortcut J and cycle through them with Shift-J).
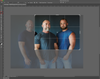
Before starting, duplicate your image to a new layer. This will make masking and fixing any mistakes easier. Either go to Layer > Duplicate Layer or use the keyboard shortcut Control-J (Command-J on a Mac).

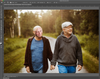
Now, it’s time to begin. Grab the Patch Tool and make sure Patch: Content Aware is selected in the Menu Bar so Photoshop automatically blends things for you. Then click-and-drag to draw a rough selection around a chunk of your no-good ex’s face. (Satisfying?).
Next, click in the center of the selection and drag it to whatever part of the image you want to cover them up with. I’m using the bushes in the background.

Repeat this process until all the big areas of your ex are covered, then grab the Healing Brush.
The Healing Brush is much better for fine detail work. We’re going to use it to cover up the small areas and also fix any areas of the patch that have an obvious repeating pattern, like the weird strips of white in the photo. To use it, you Alt-Click (Option-Click on a Mac) on the part of your image you want to use as a source then paint wherever you want to cover up. You can adjust the Size, Hardness, and Opacity of the brush in the Menu Bar for more control.

After a few minutes of work, you should have a patch that is starting to look pretty good. If you’re happy with how things look, you can leave it there. Or you can continue onto the next step.
Masking the patch back in
Using the healing tools can get messy, especially around the edges of your patch. The easiest way to fix this is to use a layer mask so you can have more control over the edges and correct anywhere you were a bit too judicious.

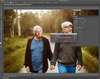
Go to Layer > Layer Mask > Hide All to bring your ex back into your image… temporarily. Next, press B to get the Brush tool, D to set the brush to the default colors (in this case, white), and select the mask in the Layers panel.

Then start painting over your ex’s face again. It will vanish as the patch gets revealed. (White on a mask reveals; black conceals.)
Use the Size, Hardness, and Opacity options in the Menu Bar to adjust your brush as necessary, and just work the edges, painting the patch back in.
If you go too far at any point, press X to swap to painting with black and cover over any mistakes.

After a bit of back and forth, you should have something that looks pretty darn good.
Hiding the problems
But, of course, things aren’t perfect. One simple way to cover up lots of problems is to color grade the image so that it feels more cohesive. Here’s one of the easiest ways to do it in Photoshop.
Go to Layer > New Adjustment Layer > Color Lookup.

From the 3DLut File dropdown select any option you like.
These are presets that remap the colors in an image. I personally like the Kodak and Fujifilm film emulation ones that come as standard, but try a few and see how they go.

And just like that, you’re done.
Method 3: Rebound with a celebrity
Sometimes editing your ex out of a photo can be too much of a challenge. But do you know what’s often easier? Replacing them with a similar (but nicer) person, preferably a celebrity.
Swapping heads
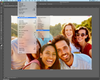
First up, find a photo of a celebrity who’s holding their head similarly to your ex, ideally on a solid background as it makes it easier to extract.
Then, open the original photo you want to edit and drag-and-drop the celebrity photo in.
By default, the Transform tool will be selected. Click-and-drag on the control handles to resize, rotate, and move the new face so it lines up with your ex’s.
(If you want to, reduce the Opacity of the celebrity face in the Layers panel so you can see through it. Just bring it back to 100% when you’ve got it lined up.)
Next, go to Select > Subject and then Layer > Layer Mask > Reveal Selection.

If you chose the photo of your celebrity date well, Photoshop should have removed the background leaving only their (beautiful) face. Now it’s just a matter of tweaking the mask so that it blends well.
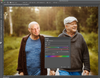
As we did earlier, grab the Brush tool with the keyboard shortcut B, then set the default colors with D. Now press X to select black and start painting in a mask to blend the two photos together.
Here, I’m painting over the tuxedo and trying to blend his face with the ex’s.
Keep tweaking the mask until you’ve got something that’s starting to look good. Don’t worry about the colors, we’ll fix them in the next step.
Matching the scenes
Since we’re blending two totally different photos, the lighting and colors aren’t going to be consistent between them. Fixing this perfectly can be a huge job, but you can normally get pretty close with a single adjustment layer.
Go to Layer > New Adjustment Layer > Hue/Saturation then in the New Layer Dialog box check Use Previous Layer to Create Clipping Mask. This will confine all your adjustments just to the celebrity face layer.
Now play around with the Hue and Saturation sliders until the celebrity face better matches the whole image. I needed to push our celeb standin a bit more towards blue on the Hue and increase his Saturation a little.
Hiding the problems
Don’t worry if things aren’t perfect. We’re, once again, going to hide as many problems as possible (even if your therapist told you to stop) using a LUT.
Go to Layer > New Adjustment Layer > Color Lookup and select any 3DLut that looks good to you. I went with another of the film emulations.
And that’s it, done! Now you have a brand new photo from your first post-breakup date with a major movie star.

Closure
These three techniques are pretty blunt, but they really work and, unless someone looks closely, they’ll likely not think there’s anything off with your photos—especially if you post it on a quality-destroying social media site.
Be warned though, your ex, if they see it, might not be too impressed with your newfound Photoshop skills.
